gazebo的模型库里已经有很多模型了,但是如果要制作自己的模型,还是在Solidworks上比较方便,本文将介绍怎么将Solidworks的模型导入到gazebo中。
一、安装URDF插件
进入官网下载,正常安装,在Solidworks的工具->Tools->Export as URDF可以找到。
二、准备工作
首先在Solidworks画好装配体,给需要单独处理的配件设置坐标系(装配体->参考几何体,先确定原点,再确定xyz轴)。比如说这里我想给圆环蓝色,给挡板黄色,就需要单独设置支架、挡板和圆环的坐标系。
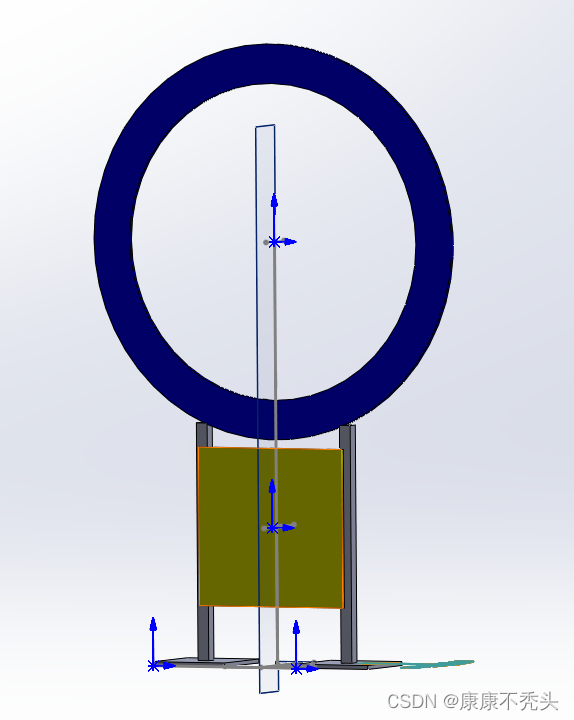
三、导出URDF文件
首先确定base_link,这里选择支架,设置base_link的坐标系,设置child link的个数,这里是两个(圆环和挡板),右键base_link可以Add Child Link。
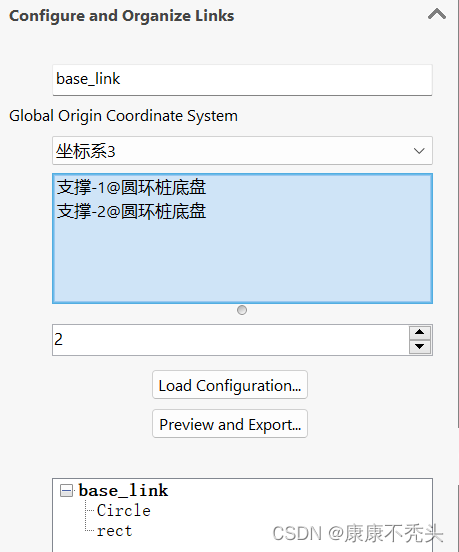
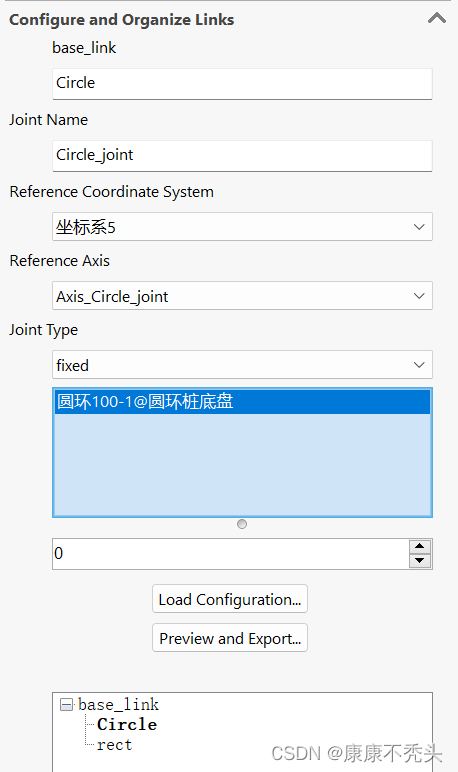
设置child link、Joint的名称以及坐标系,设置节点的类型(我这里是fixed,因为不需要转动),确认无误后,点击Preview and Export,进入导出配置界面。
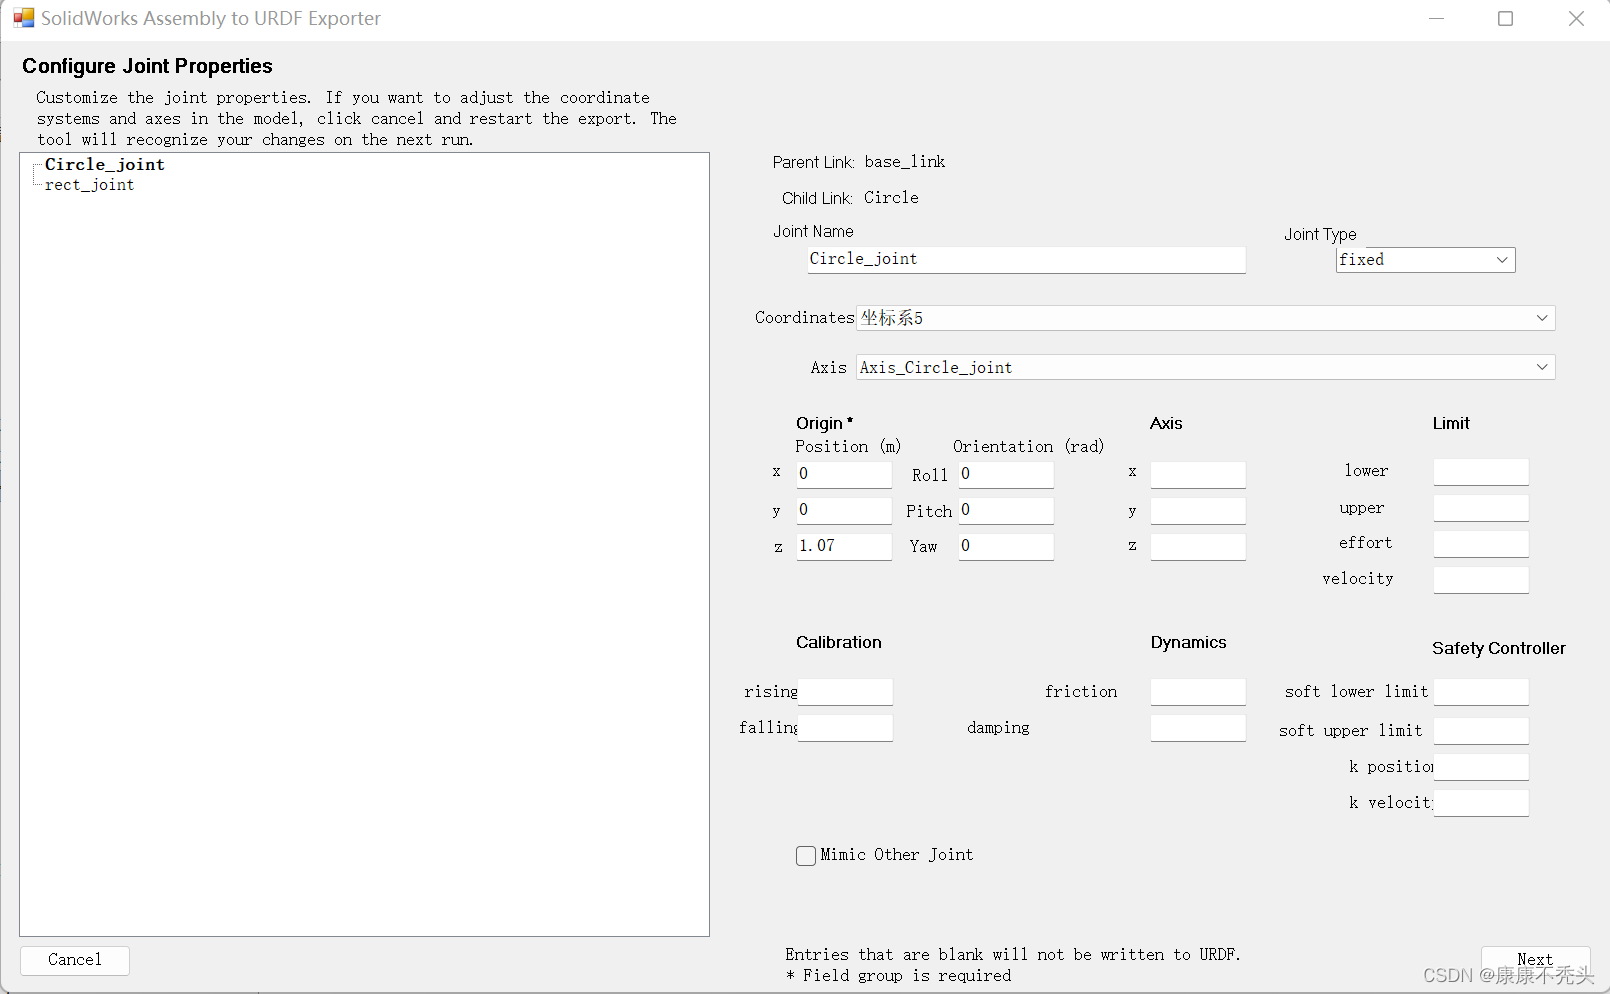
这里主要看坐标系(有时候系统会改掉),没有问题的话点击Next,点击Export URDF and Meshes,注意文件名不要有中文,把**.SLDASM**也去掉。
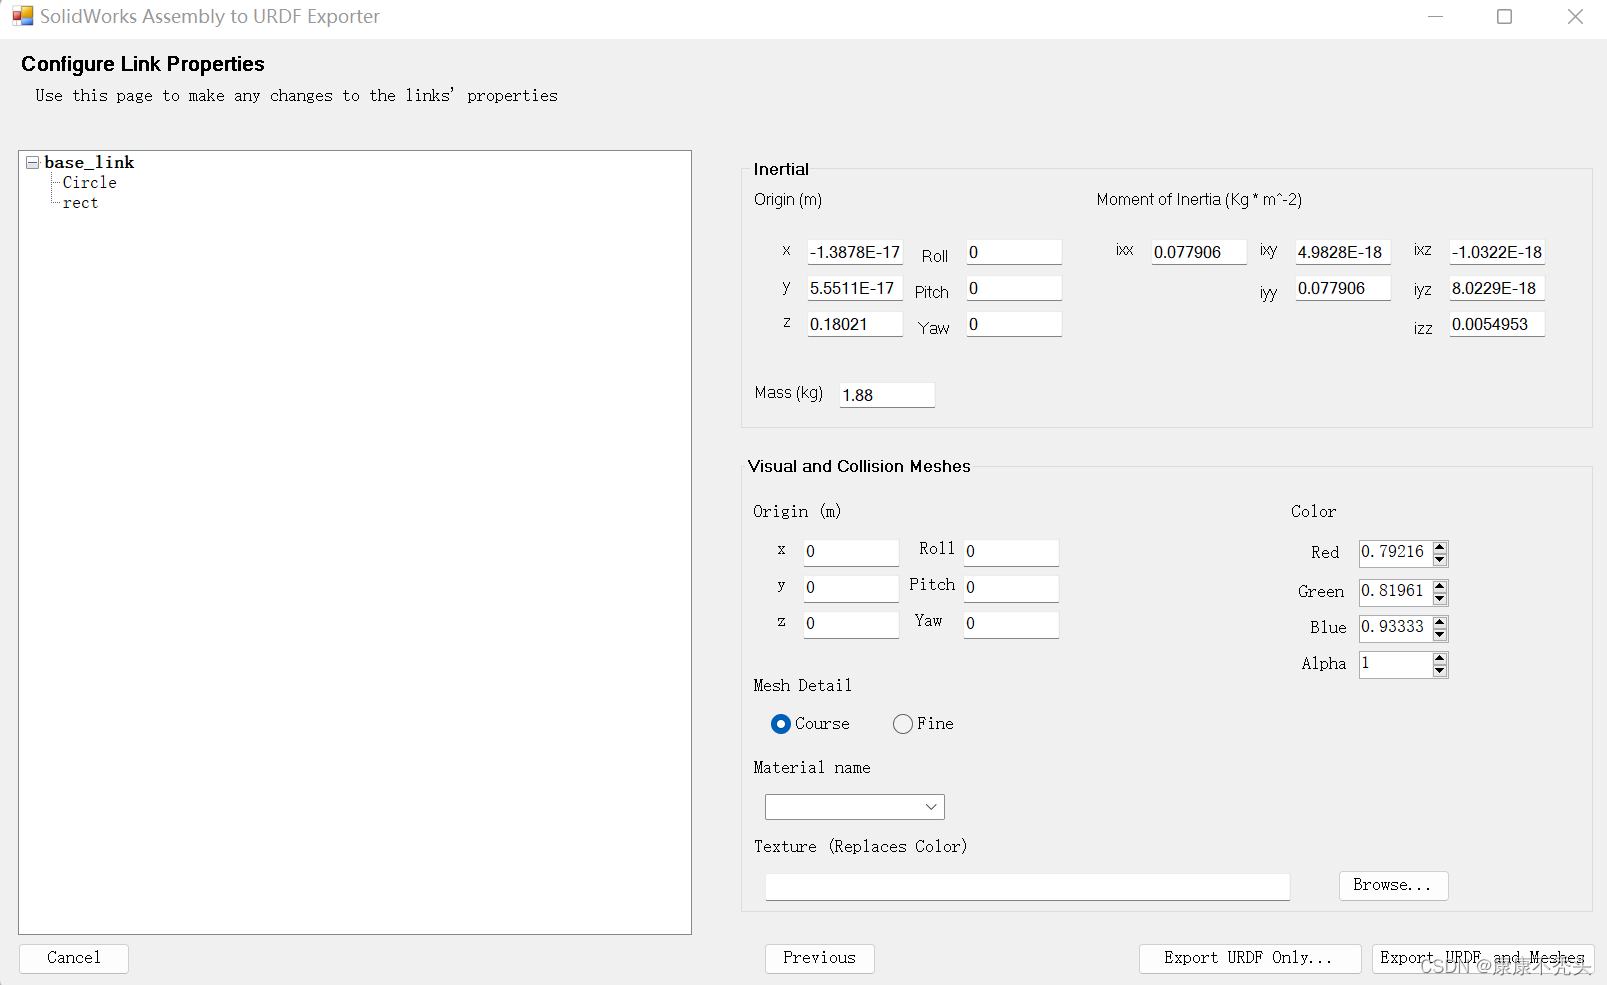
四、进入Ubuntu查看效果
首先把生成的源码放在工作空间目录(catkin_ws/src)下面,编译工作空间,接着输入命令
roslaunch circle_test display.launch
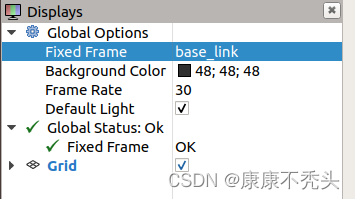
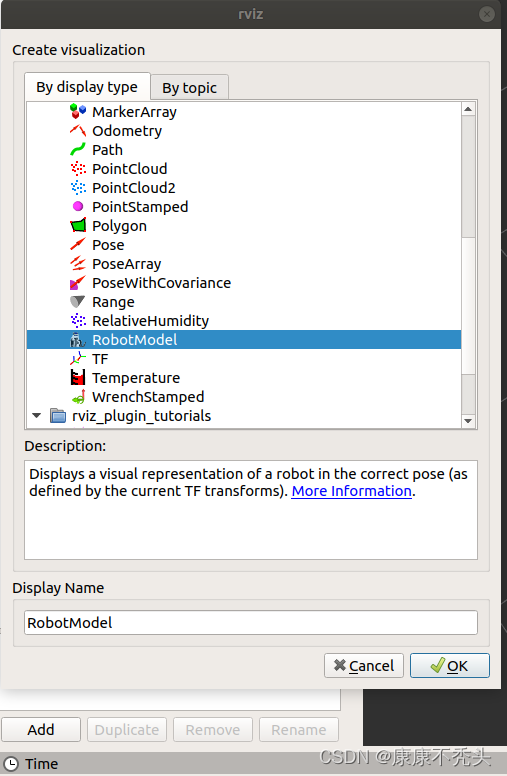
打开rviz,修改极坐标,增加机器人模型显示插件,就可以查看模型了,此时模型的颜色都是一样的,Solidworks所设置的颜色并不会被保存下来。
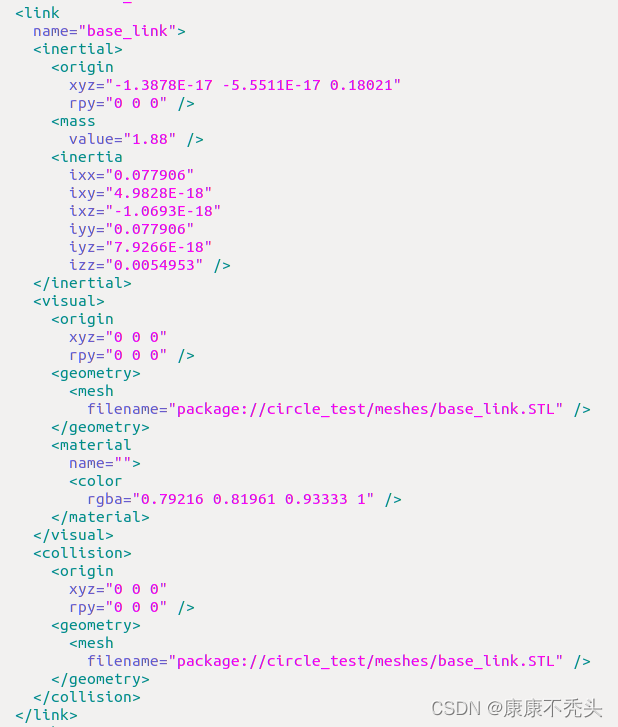
要是想修改模型颜色,可以进入urdf文件夹打开urdf文件,修改配件对应的rgba(其中a代表不透明度)蓝色可以设置成0 0 1 1,黄色可以设置成1 1 0 1。
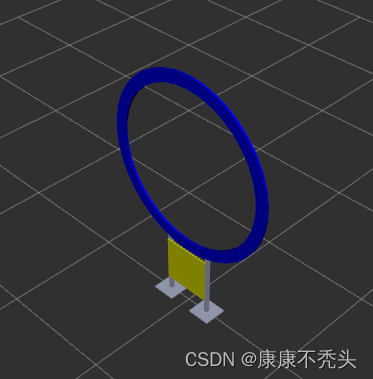
五、转换SDF格式
gazebo只能识别SDF格式,在urdf文件终端下输入
gz sdf -p circle_test.urdf > circle_test.sdf
可以发现sdf文件生成了
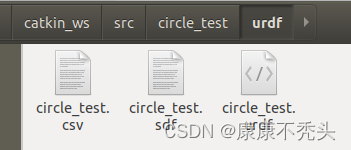
在PX4-Autopilot/Tools/sitl_gazebo/models/目录创建一个新的文件夹,将上一步生成的sdf文件,以及urdf功能包中的meshes文件夹复制进去,再创建一个model.config的文件,如图:

model.config里面定义了需要加载的sdf文件名,以及可注明作者信息等,代码如下:
<?xml version="1.0" ?>
<model>
  <name>circle_test</name>
  <version>1.0</version>
  <sdf version="1.6">circle_test.sdf</sdf>
  <author>
    <name>kang</name>
    <email>kang@163.com</email>
  </author>
  <description></description>
</model>
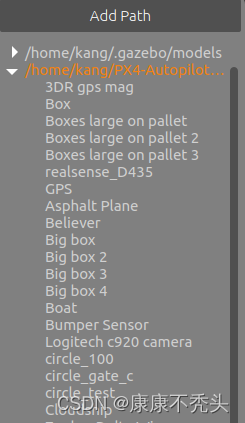
打开gazebo,可以在Insert的本地目录找到刚才搭建的模型。
sdf文件一开始也不包括颜色信息,需要自行添加,这里设置支架为黑色
 <visual name='base_link_visual'>
        <pose frame=''>0 0 0 0 -0 0</pose>
        <geometry>
          <mesh>
            <scale>1 1 1</scale>
            <uri>model://circle_test/meshes/base_link.STL</uri>
          </mesh>
        </geometry>
        <material>
          <script>
            <uri>__default__</uri>
            <name>Gazebo/Black</name>
            </script>
        </material>
 </visual>
最后gazebo的显示效果如图所示
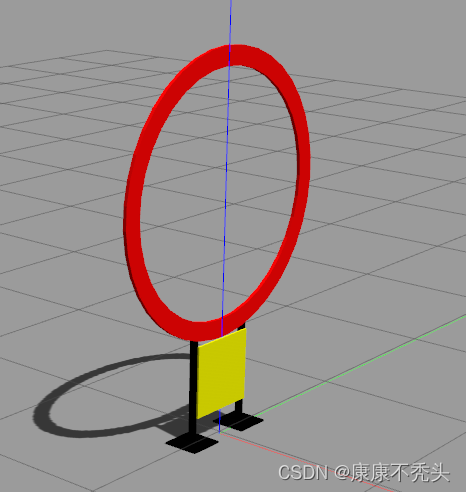
六、把模型放到world中
将sdf的内容复制到world文件下,修改model name,通过下面的代码设置模型在world中的位置和方向
      <model name='circle_test_1'>
        <pose frame=''>-0.4 6.5 0 0 -0 -1.57</pose>
        <scale>1 1 1</scale>
        <link name='link'>
          <pose frame=''>-0.4 6.5 0 0 -0 -1.57</pose>
          <velocity>0 0 0 0 -0 0</velocity>
          <acceleration>0 0 0 0 -0 0</acceleration>
          <wrench>0 0 0 0 -0 0</wrench>
        </link>
      </model>
在放置模型的过程中,我想把模型给悬浮在空中,通过在每个model末尾添加
<model name='circle_100_7'>
    <link name='base_link'>
      <pose frame=''>0 0 0 0 -0 0</pose>
      <inertial>
        <pose frame=''>0.009851 -0 0.622144 0 -0 0</pose>
        <mass>6.3074</mass>
        <inertia>
          <ixx>1.75297</ixx>
          <ixy>-1.10699e-18</ixy>
          <ixz>0.00673159</ixz>
          <iyy>1.44277</iyy>
          <iyz>1.55322e-16</iyz>
          <izz>0.317581</izz>
        </inertia>
      </inertial>
      <collision name='base_link_collision'>
        <pose frame=''>0 0 0 0 -0 0</pose>
        <geometry>
          <mesh>
            <scale>1 1 1</scale>
            <uri>model://circle_100/meshes/base_link.STL</uri>
          </mesh>
        </geometry>
      </collision>
      <collision name='base_link_fixed_joint_lump__Circle_collision_1'>
        <pose frame=''>0 0 1.07 0 -0 0</pose>
        <geometry>
          <mesh>
            <scale>1 1 1</scale>
            <uri>model://circle_100/meshes/Circle.STL</uri>
          </mesh>
        </geometry>
      </collision>
      <collision name='base_link_fixed_joint_lump__rect_collision_2'>
        <pose frame=''>0 0 0.35 0 -0 0</pose>
        <geometry>
          <mesh>
            <scale>1 1 1</scale>
            <uri>model://circle_100/meshes/rect.STL</uri>
          </mesh>
        </geometry>
      </collision>
      <visual name='base_link_visual'>
        <pose frame=''>0 0 0 0 -0 0</pose>
        <geometry>
          <mesh>
            <scale>1 1 1</scale>
            <uri>model://circle_100/meshes/base_link.STL</uri>
          </mesh>
        </geometry>
        <material>
          <script>
            <uri>__default__</uri>
            <name>Gazebo/Black</name>
            </script>
        </material>
      </visual>
      <visual name='base_link_fixed_joint_lump__Circle_visual_1'>
        <pose frame=''>0 0 1.07 0 -0 0</pose>
        <geometry>
          <mesh>
            <scale>1 1 1</scale>
            <uri>model://circle_100/meshes/Circle.STL</uri>
          </mesh>
        </geometry>
        <material>
          <script>
            <uri>__default__</uri>
            <name>Gazebo/Blue</name>
            </script>
        </material>
      </visual>
      <visual name='base_link_fixed_joint_lump__rect_visual_2'>
        <pose frame=''>0 0 0.35 0 -0 0</pose>
        <geometry>
          <mesh>
            <scale>1 1 1</scale>
            <uri>model://circle_100/meshes/rect.STL</uri>
          </mesh>
        </geometry>
        <material>
          <script>
            <uri>__default__</uri>
            <name>Gazebo/Yellow</name>
            </script>
        </material>
      </visual>
    </link>
    <static>1</static>
  </model>
七、使模型位置可变
当需要障碍物的位置随机或者一直在移动,就需要用到这个功能。
1.编写生成插件的源文件set_position.cc
先新建一个目录set_position,里面存放源文件set_position.cc。
#include <functional>
#include <gazebo/gazebo.hh>
#include <gazebo/physics/physics.hh>
#include <gazebo/common/common.hh>
#include <ignition/math/Vector3.hh>
#include <cmath>

float xx,yy,zz;

namespace gazebo
{
 class Set_position1 : public ModelPlugin
 {
   public: void Load(physics::ModelPtr _parent, sdf::ElementPtr /*_sdf*/)
   {
     // Store the pointer to the model
     this->model = _parent;

     //使用PoseAnimation类实例化一个对象,然后通过三个参数可设置运动模型名称,运动持续时间以及是否循环执行
     gazebo::common::PoseAnimationPtr anim(new gazebo::common::PoseAnimation("test", 1.0, false));
     //声明一个控制模型位姿的对象
     gazebo::common::PoseKeyFrame *key;
     xx = -0.5 + (rand()%100)/100.0;
     yy = -0.5 + (rand()%100)/100.0;
     zz = -0.5 + (rand()%100)/100.0;
     //设置模型到达某位姿的时刻
     key = anim->CreateKeyFrame(0);
     key->Translation(ignition::math::Vector3d(6.5, 0.4, 1.5));
     key->Rotation(ignition::math::Quaterniond(0, 0, M_PI));

     key = anim->CreateKeyFrame(1);
     key->Translation(ignition::math::Vector3d(6.5+xx, 0.4+yy, 1.5+zz));
     key->Rotation(ignition::math::Quaterniond(0, 0, M_PI));

     _parent->SetAnimation(anim);
   }

   // Pointer to the model
   private: physics::ModelPtr model;

   // Pointer to the update event connection
   private: event::ConnectionPtr updateConnection;
 };

 // Register this plugin with the simulator
 GZ_REGISTER_MODEL_PLUGIN(Set_position1)
}
这个代码的功能是在以1为边长,(6.5,0.4,1.5)为中心的正方体内随机生成一个点作为模型的中心,模型在一秒钟的时间从(6.5,0.4,1.5)移动到这个随机位置。
2.编写CMakeLists.txt文档
在目录set_position下新建一个CMakeLists.txt文档,内容如下。
cmake_minimum_required(VERSION 2.8 FATAL_ERROR)

find_package(Boost REQUIRED COMPONENTS system)
include_directories(${Boost_INCLUDE_DIRS})
link_directories(${Boost_LIBRARY_DIRS})

find_package(Protobuf REQUIRED)
find_package(gazebo REQUIRED)

set (CMAKE_CXX_FLAGS "${CMAKE_CXX_FLAGS} ${GAZEBO_CXX_FLAGS}")


include_directories(${GAZEBO_INCLUDE_DIRS})
link_directories(${GAZEBO_LIBRARY_DIRS})

# 使用set_position_1.cc源文件生成插件
add_library(set_position SHARED set_position.cc)

# 在生成插件过程中需要使用到的gazebo库文件
target_link_libraries(set_position ${GAZEBO_LIBRARIES} ${Boost_LIBRARIES})
3.编译
在set_position目录下,新建一个build目录然后进入buid目录右键打开终端,输入【cmake ..】命令,然后再输入【make】命令就会在build目录生成一个libset_position.so库文件。
4.使用插件
在world文件中的
<plugin name="set" filename="libset_position.so"/>
同时将生成的set_position_box.so文件放在gazebo默认的库目录(/usr/lib/x86_64-linux-gnu/gazebo-9/plugins),由于权限问题,我们在build文件中使用sudo命令复制:
sudo cp ./libset_position.so /usr/lib/x86_64-linux-gnu/gazebo-9/plugins/libset_position.so
这个时候运行world打开gazebo,就可以看到模型的运动了。
